Fit-out snagging and handover checklist for Dubai homes
Snagging is the inspection at the end of a fit-out or renovation, before you sign the handover. In Dubai it is done in daylight with the air conditioning running, because heat, dust and humidity show faults that an evening viewing misses. This checklist takes a villa or apartment owner through the space room by room: what to test, what to ask for in the handover file and what counts as a defect once you move in.
Free site visit · Approvals handled by us · Designed in 3D
What snagging is and when it happens
A snag is a small fault in finished work: a paint miss behind a door, a drawer that does not close square, a hollow tile, a dead socket. Snagging is the walk that finds them together, after the works are complete and before the handover is signed, while the contractor's team and spare materials are still on site. A snag on the list at that point is the contractor's to fix; the same fault noticed after the keys change hands turns into a discussion. Snagging closes the sequence set out in our villa renovation timeline and the commercial fit-out process. Ask the contractor to walk the space with you and to close the list before sign-off, whether the job is a residential fit-out in a villa or a commercial fit-out in a leased unit.
How to walk the space
Treat the walk as a job, not a viewing: set aside a morning, bring the drawings and take someone to keep the list.
- Take the drawings and the specificationWalk with the approved layout, the joinery drawings and the finishes schedule. A snag is anything that differs from what was agreed: a socket in the wrong place, a worktop in a different finish from the sample, a missing shower niche.
- Room by room, ceiling to floorFinish each room before moving on: ceiling first, then walls from the cornice down, then joinery, then floor, skirting and threshold. The same order every time means nothing is skipped when attention fades in the last bedroom.
- In daylight, with the AC onSwitch the ceiling lights off first, so sunlight across the walls shows filler marks and uneven sheen, then put the downlights and cove lights on, because shallow light along a gypsum ceiling shows every joint. Run the cooling from early morning so you can judge it room by room.
- Touch everything that movesOpen every door, drawer and window, run every tap, flush every toilet, press every switch and plug a charger into every socket. Snags sit in the things that move and the things that carry water or power.
- Record as you goNumber each item with the room, the location and a photo, and put a marker dot beside the fault so the trades can find it. A complete list from a single walk is easier to close than a trickle of messages.
Joinery, walls, ceilings and floors
The fixed finishes are where a fit-out shows its quality and where most snags sit. How made-to-measure work is drawn, made and fitted is described on our bespoke joinery page.
Doors, drawers and soft-close
Hinged doors should swing freely, close fully and sit flush with their neighbours; sliding doors should run without catching. Pull each drawer out and let it close on its own: a soft-close runner that slams or stops short needs adjusting. Handles should line up along a run.
Alignment, gaps and edges
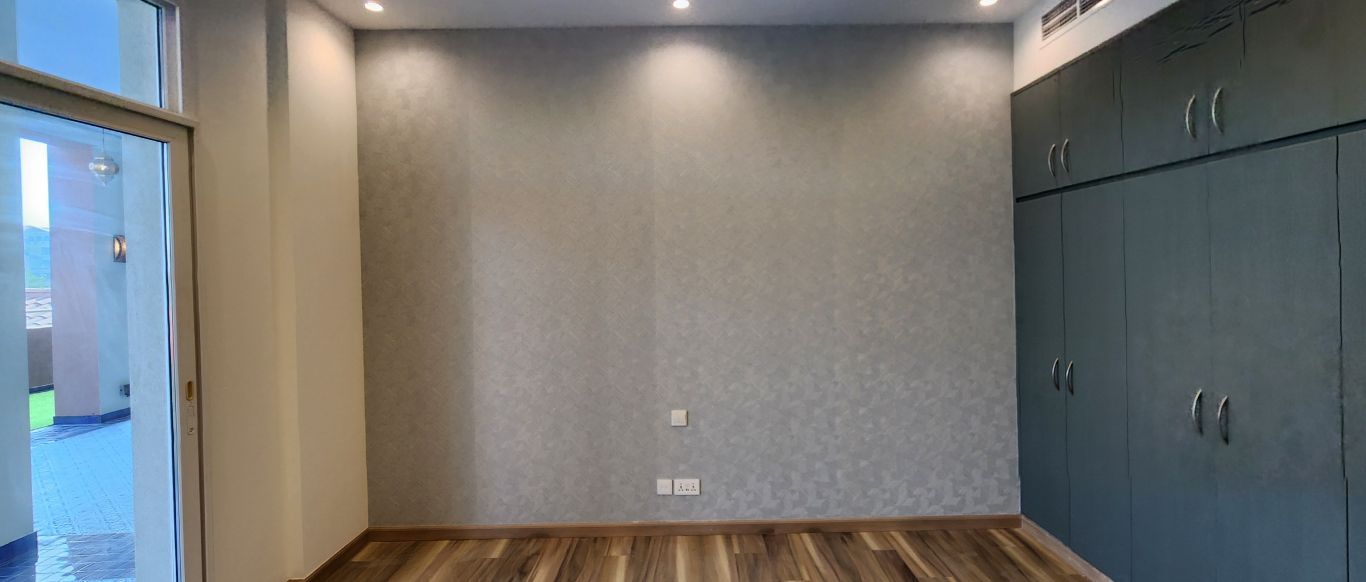
Look along a run of fronts for a door that sits proud or a gap that widens towards the floor. Many Dubai walls are not square, so the scribe against wall and ceiling should be a neat line of filler or trim, not a bead of silicone. Check for lifting edging and chipped corners.
Finish on the joinery
Check painted and lacquered fronts in daylight for sanding marks, runs and dull patches, and veneer for colour that changes between doors. Inside, shelves should be level, back panels fixed and interior lights working.
Paint and gypsum
Walls should be an even colour and sheen with no filler shadows or misses behind doors. On a gypsum ceiling, joints and screw heads must disappear under grazing light. Hairline cracks where a new bulkhead meets the wall are common as a ceiling dries in Dubai's heat, and they are a legitimate snag; our interior painting page explains the preparation under the paint.
Access panels
Every concealed AC unit, valve and junction box needs an access panel you can find and open. Check that the panels are where the drawings show them, that they open without tearing the paint, and that the item behind can be reached.
Floors and thresholds
Walk every floor in socks and feel for lippage and creaking boards. Tap large-format tiles for the hollow note of voids beneath. Grout joints should be full and even, doorway cuts matched on each side, and the tile-to-wood threshold level or trimmed. Our tile fixing page covers the base and layout before laying.
Kitchens and bathrooms with the water on
Test with water, not with your eyes
Wet rooms are where a snag turns into damage, so test them under flow. Run every basin, bath and shower and watch the floor: water should run to the drain and leave nothing standing in a corner. Feel the trap and connections in the cupboard beneath each basin for dampness, and confirm that hot water reaches every tap. Silicone around the shower screen, bath, basin and worktop should be a continuous bead with no gap at the corners. Run the extractor fan and confirm the air moves. Where a bathroom was rebuilt, ask whether the waterproofing was flood-tested before tiling; our waterproofing for wet areas page describes the floors, shower walls and upstands treated before the tiles go on.
In the kitchen run the sink and dishwasher together and look under the sink with a torch; the first leak usually sits at a compression joint or the dishwasher connection. Check that the hob, oven and hood are level and sealed to the worktop, the worktop joint is tight, the splashback is sealed along its bottom edge and the under-cabinet lights do not flicker. Dubai's summer humidity swells any board that takes water, so a sealed, well-drained wet room protects the joinery around it.
Services, glass, metal and the outside
The services are tested as systems, not glanced at. Where the mechanical, electrical and plumbing work was planned with the design, as on our MEP works for villa renovations, the plates, grilles and drains should sit where the 3D showed them.
Every socket, switch and light
Plug a charger into every socket and work through every switch to confirm which light it controls. Dimmers should dim without buzzing, stair lights should work from either end, and plates should sit flat without a halo of bare plaster. Circuit labels in the distribution board should match the rooms.
AC cooling in every room
With the system running, hold a hand at each grille and read the thermostat against a thermometer. A bedroom warmer than the rest usually means a damper, duct or return air path that was not finished. Open the access panel, look at the condensate tray and drain, and check the ceiling beneath for staining. Our AC installation page covers condensate drains and ceiling access.
Drainage and leaks
Run the floor drains and the balcony or terrace drain with a bucket of water and watch where it goes. Check under every sink, around every toilet base and at the water heater for dampness, and look at the ceiling below each upstairs bathroom.
Glass and metal
Look across every mirror, shower screen and glass balustrade at an angle for scratches and chips. Frames, handles and black fittings should be free of overspray, and hinges and closers quiet. Aluminium windows and sliding doors should close, lock and seal all round; a draught at a sliding door is a cooling bill in July.
External areas
Walk the paving for rocking slabs, open joints and puddles after a hose-down, and confirm that garden drains and AC condensate outlets run clear. Switch the outdoor lights on at dusk and run each irrigation zone to see that every emitter works. Sand finds every open joint in Dubai, so an unpointed paving edge is a snag.
Documents at handover and closing the list
What you should leave with
The handover file is as much a part of the job as the paint. Ask for the as-built drawings, with pipe and cable routes and access panel positions marked as installed. Add the test records for plumbing, waterproofing and electrics, the AC commissioning notes, manuals for every appliance and fitting, paint and tile references with spares, and every key, remote and access card. Where an authority or the building was involved, the file should hold the permits, NOCs and completion certificate or building sign-off that applied; which of these apply depends on the community or building, and the party who applied for them should hand them to you.
The snag list is a document too: dated, numbered, agreed with the project manager on the day, and closed item by item with a note of what was done and when. Ask for a follow-up walk once the items are marked done, and only then sign. For a tower unit the building management may want its own inspection of the corridors and lift before it releases any deposit the building holds; our apartment renovation planning guide covers that handover. On our projects one project manager stays your contact through to handover.
The defects period and settling in
Most contracts set a defects period after handover, during which faults that appear in use are the contractor's to put right; read that clause before you sign. The distinction that matters is between a defect and wear. A door that drops on its hinges, a hairline crack along a new gypsum joint, a hollow tile that cracks and a thermostat that reads wrong are defects: the work was not right at handover. Scuffs from moving furniture, a chipped worktop, dusty AC filters after a sandstorm and oil stains on the grout are wear. Keep a running list early on: run the cooling at full load on the first hot afternoon, use every shower and check the ceilings below the bathrooms. Before the first summer check the AC drains; after the first rain look at the terrace and roof outlets. In a phased villa renovation, ask for each phase to get its own snagging walk and list before the next opens up another part of the house.
Finished interiors from our projects
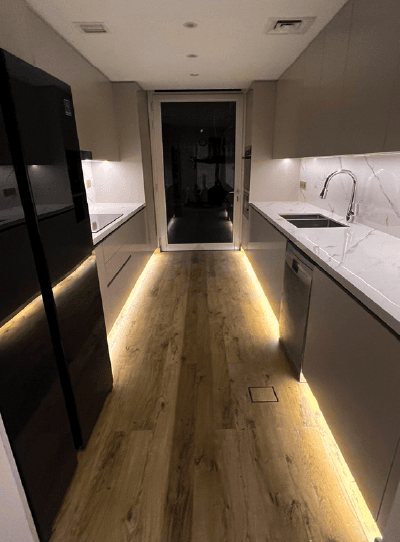
Project Mudon
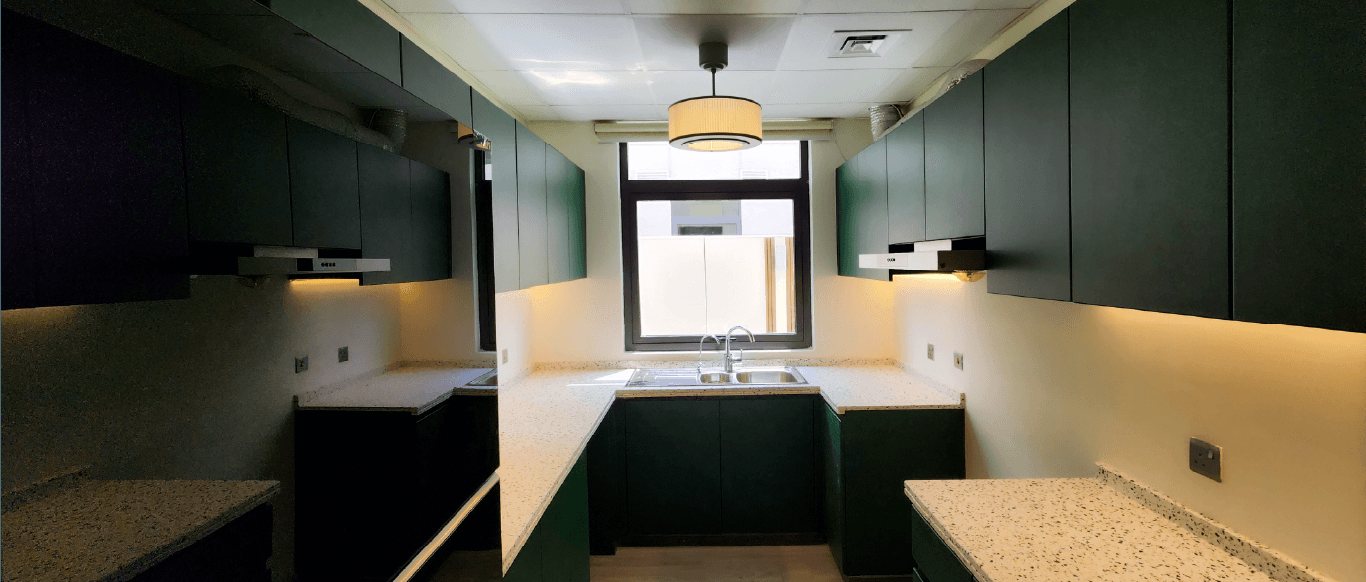
Arabella, Mudon · 250 sqm · May 2024 - June 2024A galley kitchen with handleless units on both sides, plinth and under-cabinet lighting over a white marble-look worktop and splashback, an undermount sink and a dishwasher under the worktop. The cabinets were made by our joinery team as part of an indoor and outdoor transformation in Arabella, Mudon, that also included tiling, gypsum ceilings and lighting.
View project →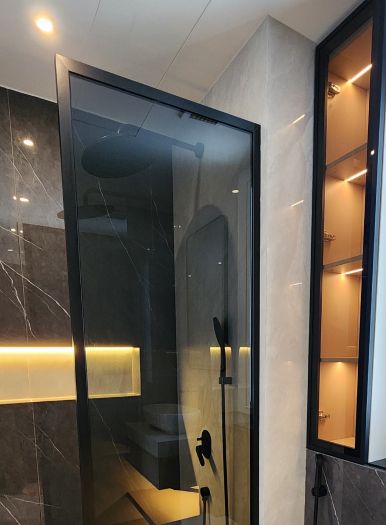
Project Celine
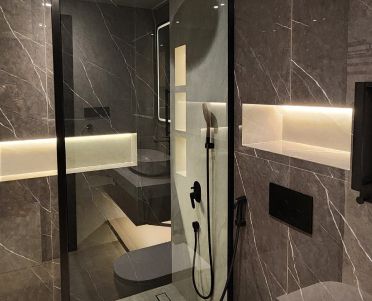
Mudon, Dubai · Approx. 340 sqm · Q3 FY24 to Q4 FY24A bathroom with a black-framed glass shower screen in front of grey veined wall tiles, a ceiling rain shower, matte black fittings and a warm-lit wall niche, part of a full-scale renovation of a standard unfurnished villa in Mudon in which the bathrooms were redesigned with practical wall niches.
View project →More of our work: YouTube · Instagram · our Google reviews
Questions and answers
When should snagging be done?
Who does the snagging, the owner or the contractor?
Why should the AC be running during the walk?
What should the handover file contain?
Is a hairline crack in a new ceiling a defect?
What is the difference between a defect and wear?
More guides
Our related services
Contact Us
Ready to bring
your vision to life?
Get in Touch
We appreciate your interest in OutMazed ® Design and would be delighted to assist you with your design requirements. Our team of professionals are committed to providing you with the highest standard of service and satisfaction possible.
Please feel free to contact us and let us know what you're interested in or looking for. We are here to assist you whether you need help with a new project, renovation, or just some design advice. Fill out the contact form below, and one of our staff will contact you as soon as possible.
Alternatively, you can also reach us via phone or email, and our friendly staff will be happy to help you. We encourage you to take the first step towards transforming your space with OutMazed ® Design by contacting us today.